In this guide you will learn the following:
- How to install Gorilla Tag mods on PC
- How to install Gorilla Tag mods on Oculus Quest
Let’s start with PC.
How to Install Gorilla Tag Mods on PC
Mods installation on pc (whether you have a Steam or non-Steam game version) is extremely easy, just follow these steps:
- Get Monke mod manager from our site as it contains all necessary libraries and utilities to run mods and helps with mods installation in general.
- Download any GTAG mod or mod menu you like. Mod menus contain a lot of mods but not all of them are regularly updated. Download mods from gorilla-tag-mods.com as we publish original modifications from their respective creators.
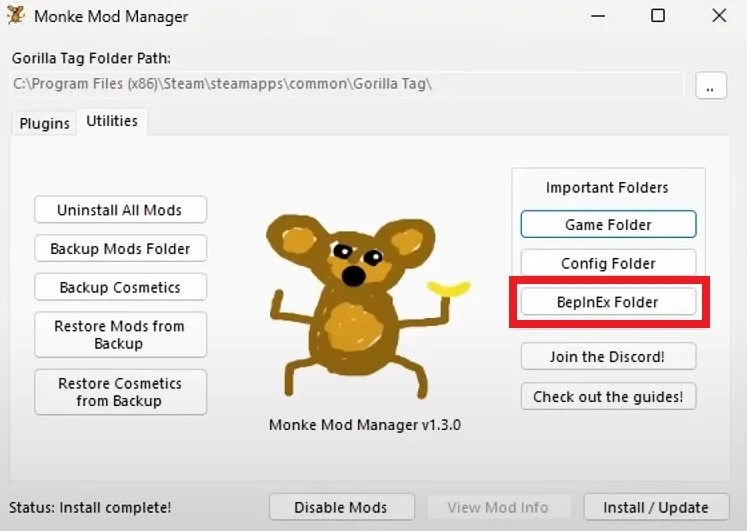
- Unzip the file and place the .dll-file into the Steam\common\Gorilla Tag\BepInEx\Plugins folder. You can access this folder straight from the Monke mod manager:
- Run the game with your mods!
P.S. You may need additional library to run some mods. Here’s a list of the most used GTAG libraries/utilities:
- BananaHook
- Bepinject + Extenject
- Computer Interface
- Newtonsoft.JSON
- TMPLoader
- Utilla
- Newtilla
- Reinforcetilla
How to install Gorilla Tag mods on Oculus (Meta) Quest
UNFORTUNATELY, QUEST MODS AREN’T COMING BACK!
Ever-ever…Yes, that’s the unfortunate truth. Use your PC if you want to play Gorilla Tag with mods.
The information below is for historical purposes only (meaning the guide doesn’t work anymore).
Gorilla Tag mods installation on Oculus Quest is very similar. If you have PC, then follow the instructions above, just the Plugins folder will be located in Oculus\Software\Software\another-axiom-gorilla-tag\BepInEx\Plugins. The rest is the same.
However! If you want to install GTAG mod on Oculus Quest without pc, that’s where you need to take a lot of steps to succeed.- Go to the store and download Mobile VR Station.
- Open the the Meta Quest browser and download any file manager. We will be using CX File Explorer in this particular case.
- Open Mobile VR Station, allow permissions, navigate to Local Files > All Folders > Android > Data, select Scoped Storage Actions, and click Step 1: Request access.
- Click on Quest 3 or Quest 2, then select Download folder and click on the apk file of a file manager you have just downloaded. Click Continue to install it.
- Open the browser once again and download any mod you’d like from gorilla-tag-mods.com.
- Go to Applications > Gorilla Tag, select the three-dot menu, and uninstall the game (data will not be lost).
- Now you have to download the modded Gorilla Tag apk and mods for it. Click here to download it.
- Open your CX file manager, go to Downloads > M.zip. There you find 4 folders.
- Open the folder “1” and install Gorilla Tag apk.
- Copy and paste the ModData folder from “2.Main” to Main Storage.
- Copy and paste the QuestPatcher folder from “3.Main” to Main Storage.
- Open the folder “4.Data” and copy com.AnotherAxiom.GorillaTag to Main Storage > Android > data. Select Merge and Overwrite (Apply to all files) when prompted.
- Open Gorilla Tag and do not select Restore app. Enter the game to verify the mod installation by checking for custom cosmetics, maps, or other features.
We recommend always installing Gorilla Tag mods with pc, as you will have way more mods available for the game.